Installing and Activating the Software
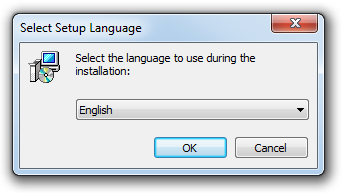
Launch the ElPicsPrint setup file on your PC. In the dialog box that appears select the desired language and click OK.
The setup wizard will open. Please follow its instructions. To continue the setup, click Next on each step. If you change your mind and don’t want to install the software, click Cancel. When the setup wizard finishes, click the Finish button.
You can launch the ElPicsPrint software just after it is installed, using the Desktop icon or from the Start menu. If the application had been activated before, ElPicsPrint opens immediately. However, if you installed ElPicsPrint for the first time or the software had never been activated, you’ll be prompted to activate the application or to use it in evaluation mode until the trial period ends.
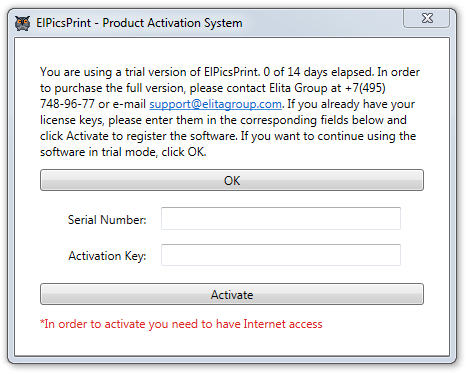
Please enter the serial number and the activation key, then click Activate. In order to activate the product, you need to have Internet access. If the activation is successful, you’ll receive a message «Activation successful. Please click OK to launch the software.» If you want to evaluate the application, click «OK».
Now ElPicsPrint is installed and ready to use.
Software Description
The application is designed for creating, editing and embossing tactile graphics on Braille embossers as well as using devices with termal technology for tactile images. This version supports Basic-D, Everest-D, BrailleBox and FanFold-D embossers from Index Braille; VP Delta, VP Columbia, VP Rogue, VP EmBraille, VP Max, VP SpotDot, VP Elite, VP Premier embossers from ViewPlus; Romeo and Juliet from Enabling Technologies.
ElPicsPrint supports the following file types:
- Svg and elpe: Due to the fact that ElPicsPrint supports Scalable Vector Graphics (svg) files, you can use graphics editors able to process them, such as Adobe Illustrator, CorelDraw, Inkscape and others, as well as use these apps together with ElPicsPrint. If you are not planning to use graphics editors, we recommend to save your images as elpe files. ElPicsPrint is the default application for such files, so you can easily open them from Windows Explorer.
- Bmp, jpg and png: When opening a bitmap image, a new document is created, and the image is placed so it takes the maximum possible area of the document. Then you can work with the document and the added image as usual. Also, with the help of the «Image» tool, you can add a number of bitmap images after creating a new or opening an existing document.
- Elpp: Contains information as tactile dots ready to be embossed and does not allow any editing. these files can easily be used by people who are blind or have low vision. Designed for saving and subsequent embossing images on Index Braille embossers only. ElPicsPrint is the default application for such files.
The software has three modes of operation: Start mode, Edit mode, and Emboss mode.
When you launch the application from the Start menu or by clicking its Desktop shortcut, it opens in the Start mode. This mode allows you to create a new image or open an existing file.
After creating a new file or opening an existing one the software switches to the Edit mode. It is the main mode allowing to create and edit objects in a document.
You can switch the software mode from Edit to Emboss mode that allows to preview the image that will be embossed, as well as send the image to the embosser.
You can see the help and the info about the software, as well as edit ElPicsPrint options in any mode of operation.
Note: When you start the application from a shortcut on the desktop or from the Start menu, or when you open a file from Windows Explorer, a new instance of the application opens. It is possible to use several instances of the application at the same time and copy elements from one document to another.
User Interface
Let’s look at the ElPicsPrint user interface in each mode of operation.
The main space is occupied by the working area. The application controls are on the right side.
Just after launching the application window looks like this:
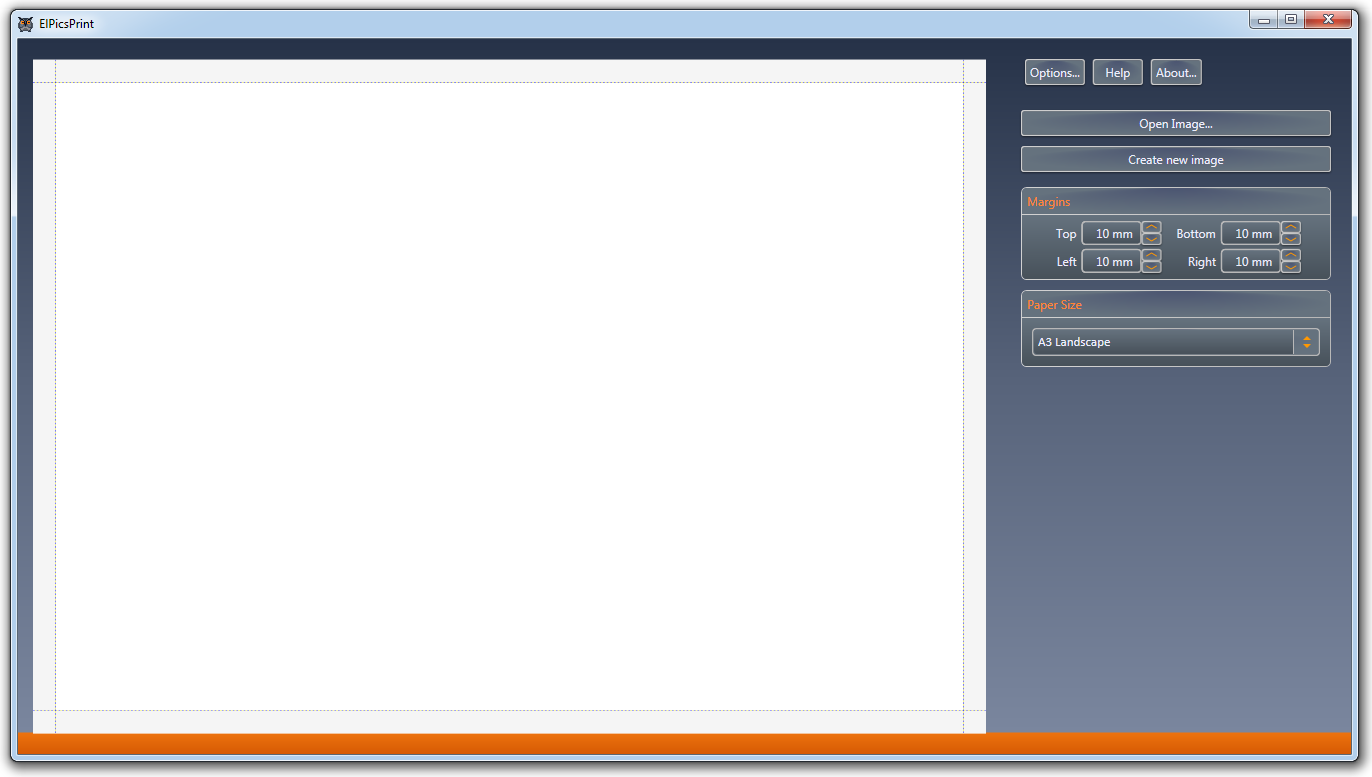
In all modes of operation the main window contains the following buttons:
- Options — when this button is clicked, the ElPicsPrint options window opens.
- Help — When you click this button, the HTML help will open in your default Web browser.
- About — Click this button to get information about software version and serial number or the days remaining in the evaluation period if you are using a trial version. You can also check for software updates in this window.
- Open Image — When this button is clicked, a standard Open File dialog opens. You can open an image file in elpe, svg, elpp, bmp, jpg or png format.
- Create New Image — Creates a new document with margin and paper size options defined in the appropriate fields below.
In the Start mode the application window also contains the following controls:
- Margins — A group of text fields that allows to adjust margins used when creating a new document.
- Paper Size — A drop-down list that Allows to choose the paper size used when creating a new document.
The paper size and margins specified here will be recommended for the document being created, but it can easily be modified in the Edit mode.
Edit mode
After opening a file or creating a new project the software switches to the Edit mode:
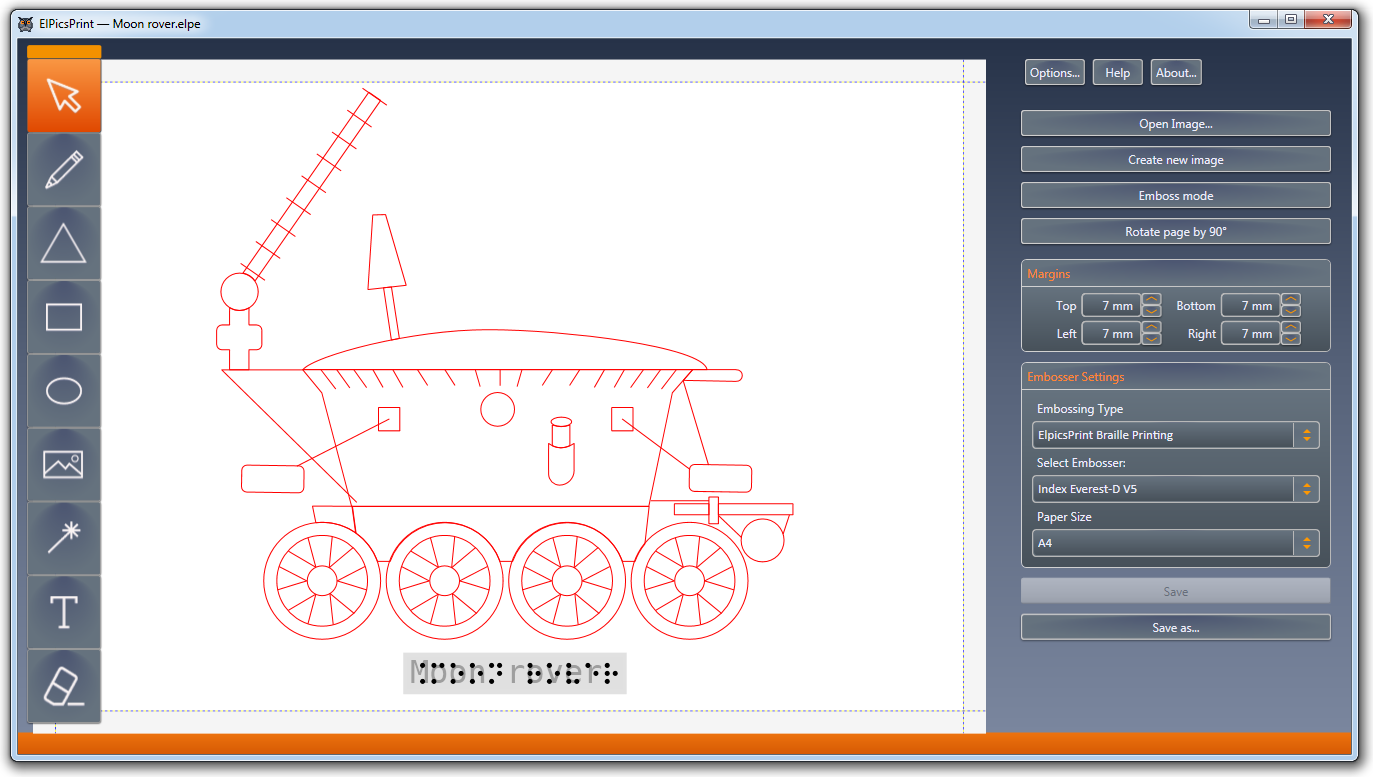
In addition to the items that are available in all modes, Edit mode window contains the following controls:
- Drawing toolbar — Contains buttons for selecting different drawing tools. When you hover your mouse over a button, a tool tip with the corresponding tool name is displayed.
- Emboss Mode — Allows to switch from the Edit mode to the Emboss mode.
- Rotate page by 90° — Allows to turn the page on the screen for more convenient work with the document if its contents should be positioned in portrait orientation. Each click rotates the page by 90°. I.e., four views are possible: 0°, 90°, 180°, and 270°.
- Margins — A group of text fields that allows to adjust the minimum space between the borders of the document and the edges of the page. The minimum value that can be set is at 7 millimeters.
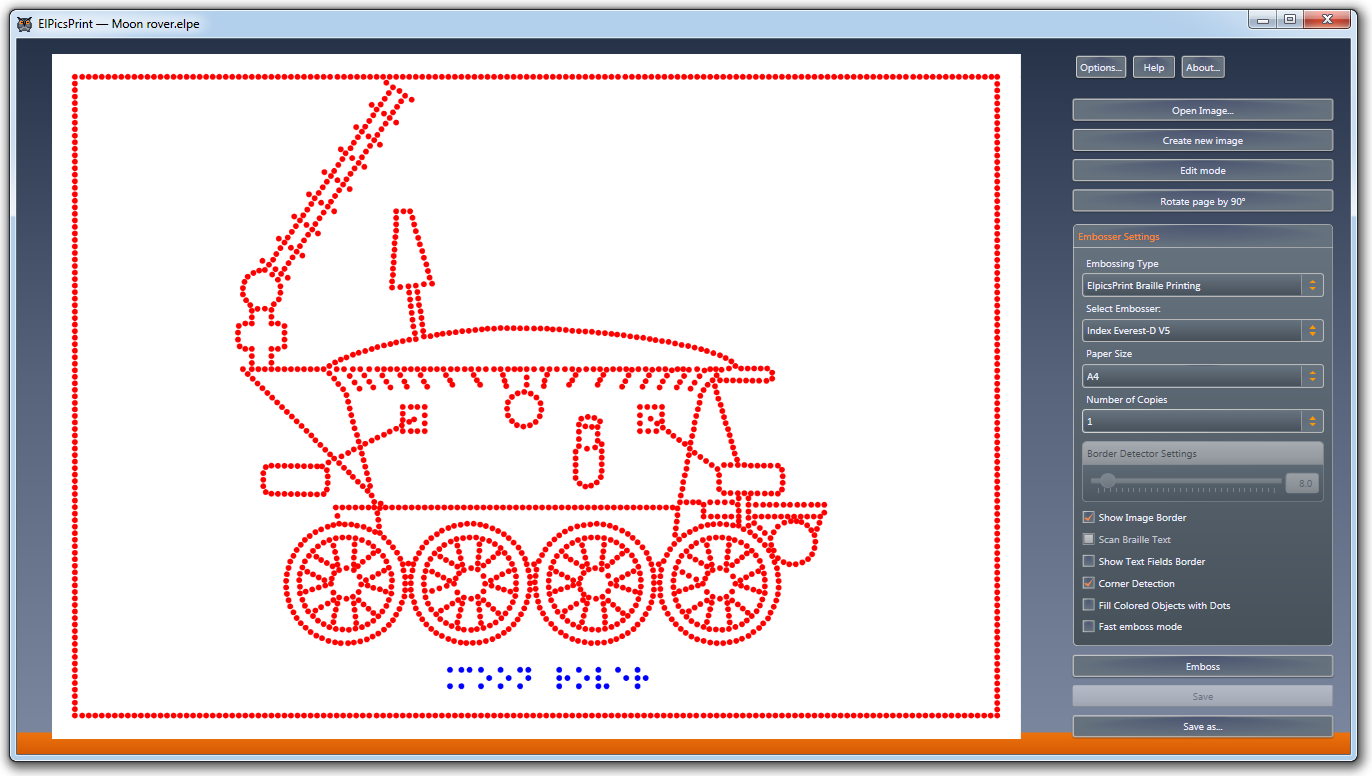
- Embosser setings — A group of controls that allows to select the embossing type, your embosser and paper size. Depending on selected embossing type and embosser, the appearance of contour textures will be different. This will allow you to see the final result without switching to the Emboss mode. This group of settings is also available in the Emboss mode and will be described in more details later.
- Save — When clicking this button, the software saves all the changes made in the document. If the button is clicked inside a newly created document, a bitmap image or an svg file created in third-party software, the Save As dialog box will be opened instead.
- Save As — When clicked, opens a standard Save As dialog box. If you want to edit your document in the future, save it either as an elpe or svg file. The jpeg format does not allow any further editing, we don’t recommend to use it for saving the results of your work: use it only as an auxiliary tool, similar to how a screenshot is used, or when working with ElPicsPrint version 1.x. If you decide to use Save As for saving file as jpeg or elpp anyway, it will be saved to your hard drive but the previous document remains open in the application, so to save all changes in it, please click Save or press (Ctrl+S).
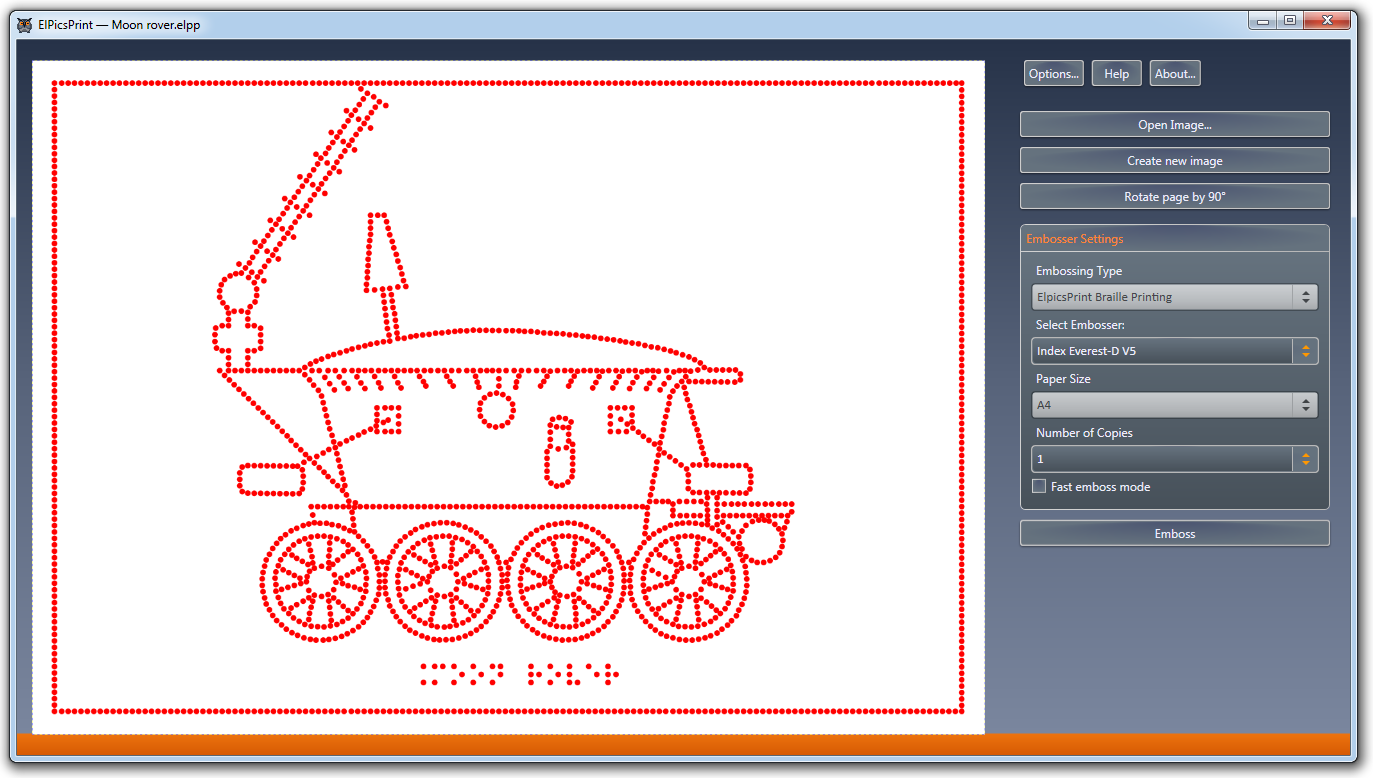
Emboss mode
To preview the resulting document and send it to your embosser, click the Emboss Mode button. The application switches to the Emboss mode:
In addition to the items that are available in all modes, the Emboss mode window contains the following controls:
- Edit Mode — Allows to switch from the Preview and Emboss mode to the Edit mode.
- Rotate page by 90° — Allows to rotate the page on the screen the same way as it is done in the Edit mode.
- Embosser settings - this group of controls is designated for adjusting the embosser settings. You can select the Embossing Type, one of the embossers connected to your computer or a vvirtual one that are available for the selected Embossing Type, set the number of copies to be embossed and, if necessary, change the paper size. There are also elements that allow you to configure the options available for the selected Embossing Type and embosser. Selecting the embosser type, embosser and paper size are also available in edit mode.
- Embossing Type - Allows you to select the type of tactile image creation. The following options are available:
- ElPicsPrint Braille printing - The tactile image is generated by the ElPicsPrint algorithm and displayed as dots. It allows you to configure all available embosser settings listed below. When this embossing type is selected, the list of available embossers will contain only devices supported by the ElPicsPrint and having the ability to generate print jobs. These are Basic-D, Everest-D, BrailleBox and FanFold-D embossers from Index Braille; VP Delta, VP Columbia, VP Rogue, VP EmBraille, VP Max, VP SpotDot, VP Elite, VP Premier from ViewPlus; Romeo and Juliet from Enabling Technologies. The document in this embossing type is displayed as dots in Preview area, exactly as it will be embossed, which allows, if necessary, to edit it in the Edit mode or change the embosser settings to achieve the desired result.
- Printing controlled by embosser driver - if you select this option, the application will send the document to emboss using the standard tools of the operating system and a printer driver. The list of available embossers will contain all devices, except for embossers from Index Braille and Romeo and Juliet models from Enabling Technologies, since they do not support this method of generating the print jobs.
When settings dialog opens, available for the selected embosser. This embossing type does not support preview - in the preview area you will only see the normal color representation of the document.
To preview the result of embossing on ViewPlus embossers for this embossing type, you can check the «Preview» checkbox in the printer settings window, or if the embosser is not physically connected to the computer, you can add a desired embosser to the system by specifying the port as «FILE»:
When sending to emboss to such a virtual embosser, the driver generates a prn file that is available for viewing in the Tiger Viewer app supplied with the embosser driver.Note: There is a possibility of incorrect output of Braille text on ViewPlus embossers in Windows 10 and 11 operating systems. It is recommended to use the ElPicsPrint Braille printing type for embossing documents with text.
- Printing on Microcapsule Paper - The tactile image is generated specifically for printing on microcapsule paper using conventional printers. The list of available print devices will include all printers installed in the operating system with the exception of Braille embossers. The standard print dialog available for the selected printer opens when sending to print.
- Select Embosser - A drop-down list that allows you to select an embosser for previewing and embossing. This list contains all available devices for the selected embossing Type installed in the system. In addition, when the embossing Type is set to “ElPicsPrint Braille printing”, this list contains some virtual embossers from Index Braille and ViewPlus. It allows a user to see a preview result of embossing on different embossers without the need to install drivers for these devices.
- Paper Size — A drop-down list that allows you to choose the size of the paper the document will be embossed on. When changing the paper size, the contents of the document will be zoomed so all the graphics data would be placed within the borders of the document, and all Braille labels would take its appropriate place.
Note: The paper orientation in this list is only relevant for embossers from Index Braille. Paper size and orientation should have the same values in ElPicsPrint and the embosser settings. It does not affect the orientation of the document content. To change the orientation of the document, use the «Rotate Page by 90°» button.
- The «Number of copies» - Allows you to set the number of copies to print.
- Border Detector Settings — This slider allows you to adjust the sensitivity threshold for the transformation of bitmap document elements into contours. If you process a contrast image, these changes may not affect the resulting image. However, if you work with a gray-scale image, the result will change dramatically. Visually adjust the values to your liking. It is possible that during this step you’ll decide that your image needs more processing in a graphics editor. The numeric value also helps when preparing the image for embossing. If a given numeric value leads to an embossing result that doesn’t satisfy your needs, you can move the slider within desired bounds from the source value to improve the refinement and consequently to increase the embossing quality. This setting is available only if the document contains at least one bitmap image.
If the Embossing type is set to «Printing on microcapsule paper», it is possible to disable the use of the border detector by unchecking the «Enable border detector» checkbox. In this case, all bitmap images of the document will be printed without any processing. This option is suitable when using bitmap prepared for printing on microcapsule paper. - Show Image Border — This checkbox determines if the image is surrounded by a border.
- Scan Braille Text — This checkbox determines whether ElPicsPrint will analyze bitmap document elements to search for Braille labels and zoom them accordingly. It is necessary for recognizing text on images prepared for ElPicsPrint version 1.x. If your document does not contain any bitmap images with Braille labels in it, we don’t recommend to check this checkbox. This checkbox is only available if the document contains at least one bitmap.
- Show text fields border - this Checkbox determines whether to display a border around text fields.
The checkbox is checked:

The checkbox is Unchecked:

- Corner detection - if this checkbox is checked, the application searches for corners in the image and forms points in their vertices in priority order. It is recommended to visually assess the need to enable this option, since not all types of images will benefit from it. In the illustrations shown below, on the left is the part of the image for which the best result is achieved with the checkbox checked, and on the right - with the unchecked one.
The checkbox is checked:
The checkbox is Unchecked:


- Fill colored objects with dots - this checkbox determines whether the colored areas of the document - internal fillings of contours, for which the texture is not set, and parts of bitmap images - will be filled with dots. The filling method depends on whether the selected embosser supports variable dot heights. If so, as it is in the case of ViewPlus embossers, a solid filling will be made with dots of different heights, depending on the background color. If not, as it is in the case of Index Braille embossers, the filling method changes depending on the color - solid filling, dots, single or double horizontal or vertical lines. It is recommended to visually assess the need to enable this option, since not all types of images will benefit from it. If you want to fill only some of the contours in the image, you can choose white for those contours that you do not need to fill.
The checkbox is Unchecked:
The checkbox is checked:
- Fast Emboss mode - this checkbox is available when the selected embossing type is set to «ElPicsPrint Braille printing». Allows you to turn on the mode where the coordinates of the dots will be rounded up to a certain value. It will increase the embossing speed, but the embossing quality will be somewhat lower.
- Print ink graphics - If embossing type is set to «Printing on microcapsule paper», then checking this checkbox makes it possible to print the entire document, including color filled contours, bitmaps and print text. It is recommended to check this checkbox when using a color printer. If «ElPicsPrint Braille printing» is selected, this checkbox will only be available if the selected embosser supports both graphics and tactile printing and will toggle this image output on and off. Only the following embossers are supported in this case: VP Elite, VP Premier, VP SpotDot.
Note: The «Corner Detection», «Fill colored objects with dots» and «Fast emboss mode» checkboxes are only available when embossing type is set to «ElPicsPrint Braille printing».
If embossing type is set to «Printing controlled by embosser driver», then only the «Show Text Fields Border» and «Show image border» checkboxes are available.
- Embossing Type - Allows you to select the type of tactile image creation. The following options are available:
- Emboss — pressing this button Sends the current document to the selected embosser.
- Save — pressing this button saves all the changes in the document the same way as in the Edit mode.
- Save As — pressing this button opens a standard Save As dialog box the same way as in the Edit mode.
Additionally, if Index embosser is selected, it is possible from the Emboss mode to save your document with *.elpp extension. The elpp file contains info as dots ready to be embossed and does not allow any further editing. These files are easy to use for people who are blind or have low vision.
Also, if «ElPicsPrint Braille printing» and an embosser from ViewPlus are selected at the same time, it is possible from the Emboss mode to save as prn file. This file, basically, is a print job for ViewPlus embossers. This option is similar to the «Print to file» function. ElPicsPrint does not support viewing and editing these files. To view and emboss this type of file, please use the Tiger Viewer app supplied with the ViewPlus printer drivers.
If you select jpeg, elpp or prn as a file type it will be saved to your hard drive, but the previous document will be still opened in the application. to save the changes, press the Save button (Ctrl+S).
After opening the elpp file, the software will switch to the restricted Emboss mode. Only page rotation, embosser selection (Index embossers only), the Number of Copies, the Fast Emboss mode checkbox and the Emboss button are available in this mode:
ElPicsPrint Options
You can adjust the application options by clicking Options in the main window.
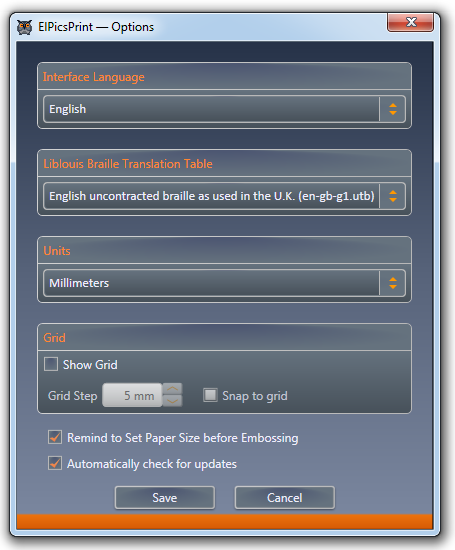
The following options are available:
- Interface Language — Allows you to select the interface language.
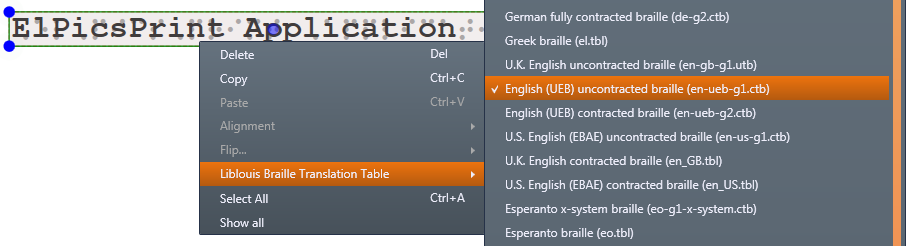
- Liblouis Braille Translation Table — Allows you to select the translation table that will be used to convert text fields into Braille labels. The selected table will be applied when creating new text fields, as well as when opening documents with text fields containing no information about the translation table being used. If it is impossible to correctly convert text using the selected translation table, the background of the corresponding field becomes pink, and a warning message is displayed when trying to open the document for preview.
- Units — Allows to select measurement units used in the software. Available values are Millimeters and Inches.
- Grid — A group of controls allowing to turn displaying of the grid on and off, adjust the grid step and toggle snap to grid. By default the grid is not displayed.
- Remind to Set Paper Size before Embossing — This checkbox determines whether a reminder will appear to ask a user to set the appropriate paper size for the current document in the Index Braille embosser settings. the checkbox is checked by default.
- Automatically Check for Updates — This checkbox determines if the application checks for updates automatically. If the checkbox is checked and an update is available on the software launch, you will be presented with a dialog box asking if you want to download the update. If the checkbox is unchecked, you will need to check for updates manually in the About window. The checkbox is checked by default.
Creating Images
ElPicsPrint version 2 is a graphics editor containing tools needed to prepare and emboss tactile graphics. This editor is available in Edit mode which is the main mode after opening an existing document or creating a new one.
When creating a new document, the selected margins and paper size are taken into account. The document being created will have the proportions corresponding to the selected paper size and margins. Please bear in mind that if you select another paper size in Edit or Emboss mode, the initial document will be re-scaled according to the new size, and when creating or editing objects afterwards, it is possible that some of them would be out of the document borders, since it might have proportions different from those of the initial paper size. As the result, the information will be partially brought outside the embossing area when returning to the initial paper size or selecting another one. You can bring all objects back into the visibility area by using the Show All item in the context menu of the working area.
A document can contain three types of objects: contours, bitmap images and text labels. The ways to create and edit objects are described below.
Drawing Tools
The drawing toolbar allows you to add to your document objects such as contours, bitmaps, and text labels and modify them.
The drawing toolbar layout is shown below.

You can move the toolbar on the screen by dragging it by the orange rectangle on its upper or left edge. You can position the toolbar vertically or horizontally depending on your preferences. the toolbar orientation changes automatically when it is moved close to window borders. You can also change it by double clicking the orange area.
The following tools are available:

|
The Arrow tool. This tool is active if no other tool is selected. It allows you to select and edit objects. |

|
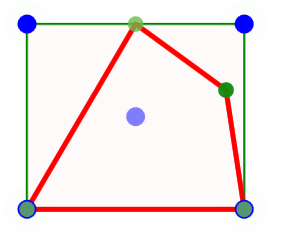
The Pencil tool. This tool allows to draw lines consisting of straight segments and Bezier curves. To draw straight segments, use single left mouse clicks on the image. To draw a continuous curve, press and hold the left mouse button. To continue drawing straight segments, release the left mouse button and click the image again. To finish drawing an open contour, double click the image; to finish drawing a closed contour, connect the starting and ending points of the contour, thus drawing will be finished automatically. You can draw vertical and horizontal lines by pressing and holding the Shift. |
|
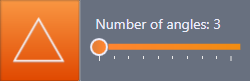
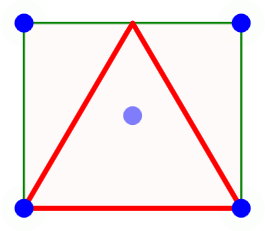
The Shapes tool. It allows you to draw polygons with angle numbers from 3 up to 12. Moving the slider on the toolbar changes the number corresponding to the number of corners and the shape on the tool icon. To start drawing, use left click of your mouse. To finish drawing, click it again. To keep the shape proportions, press the Shift key before you start drawing and hold it while drawing. |
|
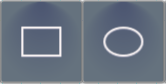
The Rectangle and Ellipse tools. The Rectangle and Ellipse tools allow drawing corresponding shapes. To draw a square or a circle, use these tools with simultaneously pressing and holding the Shift. |

|
The Image tool allows you to add any bitmap image to your document from a file saved earlier to your PC or to a removable drive. Jpeg, png and bmp files are supported. |
|
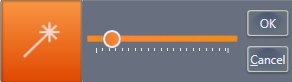
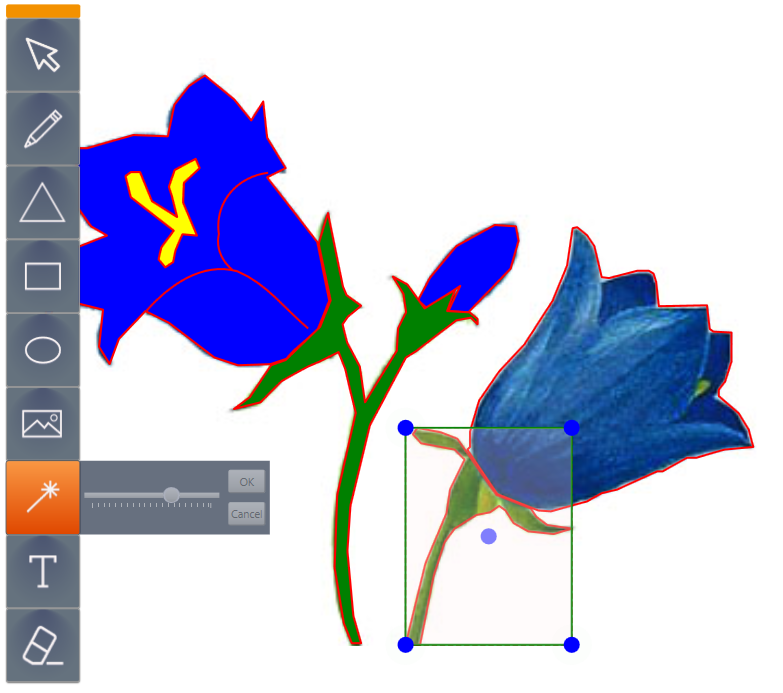
The Magic Wand tool allows you to add a line to your document that outlines an area of a specified color. The sensitivity threshold can be changed in the tool options. As a result of Magic Wand work you get a closed polyline consisting of short straight segments. |

|
The Text tool allows you to add a text label to your document. Its content can be edited afterwards. To create a text label, move the cursor to the place where you want, left click and enter text. The text you enter will be automatically converted into Braille using the Liblouis library and the selected translation table. The «Braille input» checkbox allows you to turn on and turn off the braille six-key input mode. Switching the input mode is also available by pressing the F2 button. You can freely paste text typed in Braille in other programs while creating and editing a text label. |
|
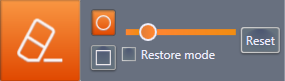
The Eraser tool allows you to make parts of bitmap images and contours transparent. You can change the size and form of the tool. It can be applied to one or several selected objects at once. If the Restore Mode checkbox is checked, the object parts being processed are made visible again. You can select this checkbox during processing by pressing the left Shift key on your keyboard. Press the key briefly to turn this mode on or off; you can also press and hold the key, then the restore mode will be active until you release the key. The Reset button allows you to remove all transparency masks and brings selected objects to their original state. Press and hold the left Ctrl key to temporarily turn off the Eraser tool in order to transform an object or select other objects. |
Select and Transform
You can select every object in the document by clicking on it with your left mouse button. You can also select several objects by pressing and holding the Shift key, or select all objects at once by using the Ctrl+A keystroke. You can also outline the area to be selected with your left mouse button. All objects fully or partially covered by that area will be selected. Please note that these actions are performed with the active «Arrow» tool.
To remove selection, press the Escape key or click an empty area of the document.
You can perform a number of actions with the selected object or group of objects: copy (Ctrl+C), delete (Delete), move (by moving the center point or moving the object with the left mouse button while holding down the Ctrl button on the keyboard), resize, and rotate them by moving central or angular points of the bounding rectangle. To keep object proportions, press the Ctrl key before transformation and hold it while performing the action. Press and hold the Shift key to transform the object relative to its central point. Holding down the Ctrl key while rotating will rotate the object in 15 degrees increments. To reposition the object, move the center point of the bounding rectangle or Ctrl-drag the selection.
When you hover the mouse pointer over the corner and center points of the bounding rectangle, as well as when transforming objects, a tooltip appears with the coordinates of this point relative to the UPPER LEFT corner of the document. If the mouse pointer changes to the index finger, then you can perform the transformation. If the mouse pointer changes to an icon indicating rotation, then you can rotate the shape. If Show Grid and Snap to Grid are turned on in ElPicsPrint options, the coordinates will be rounded to the indicated grid step when moving the points.
Editing contours
To switch an ungrouped contour to the Edit mode, double click on it with the left mouse button. When switching to Edit mode, the anchor points of the contour are marked in green. You can move and delete those points in this mode.
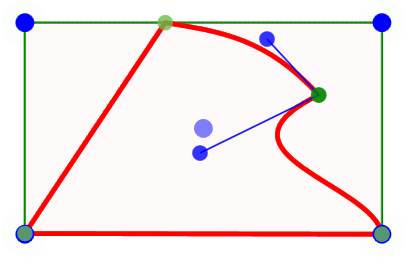
If the edited point is the anchor point of the Bezier curve, then the auxiliary points of the curve also become visible. By moving these points you can change the inflection of the curve. Double click the anchor point to remove it. To add an anchor point, double click a free segment of the contour. This point can be moved afterwards.
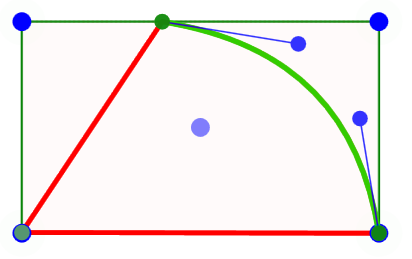
You can select the segment for editing By clicking a segment of the contour. Then auxiliary anchor points of the segment will appear, and you can change the curvature of the segment by moving these points.
You can change properties of contours such as the presence or absence of a stroke, its thickness, color, line type (solid and dotted), fill color, tactile texture type, and texture dot height by selecting «contour settings» from the contour context menu.
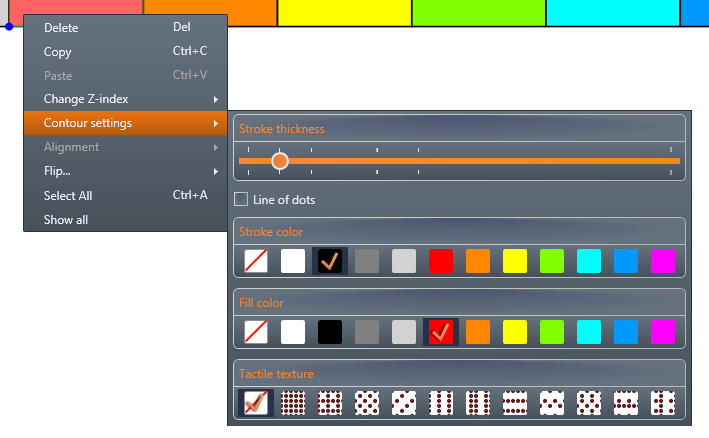
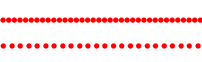
To change the thickness of the contour, move the corresponding slider. At the same time, in the tooltip you will see the approximate thickness of the contour in Braille dots. The value «1x» means single dot thickness, «2x» double, «2x +» means that the contour will be embossed in a double row of dots, with some distance between the rows.
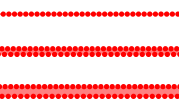
You can make a dotted contour by checking the Dotted Line checkbox in the contour Settings menu. This contour will be embossed in a broken row of braille dots. It is recommended to use this option only for contours without color filling.
You can change the color of contour in the contour «Settings menu».
When the Embossing type is set to «ElPicsPrint Braille printing», the color of the contour does not affect the embossing result of the tactile image. White and transparent strokes are not embossed.
When the Embossing type is set to «Printing on Microcapsule Paper», all strokes except gray are converted to black.
Transparent or white strokes can be used in combination with textures if you want to create an area filled with texture without delineating the area's borders.
You can change the inner color filling of the contour in the «Contour Settings» menu.
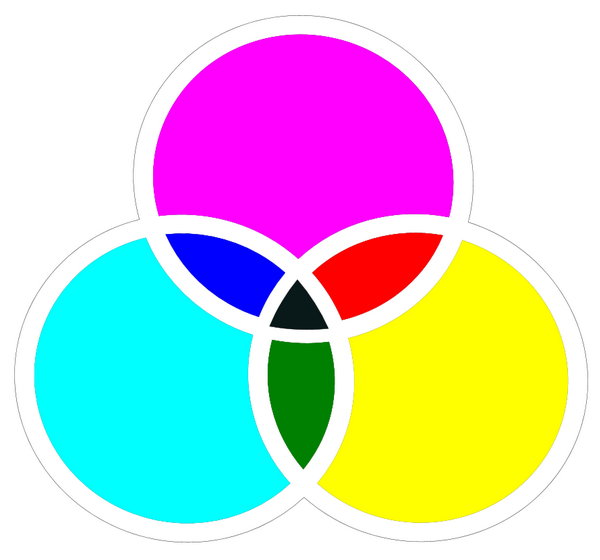
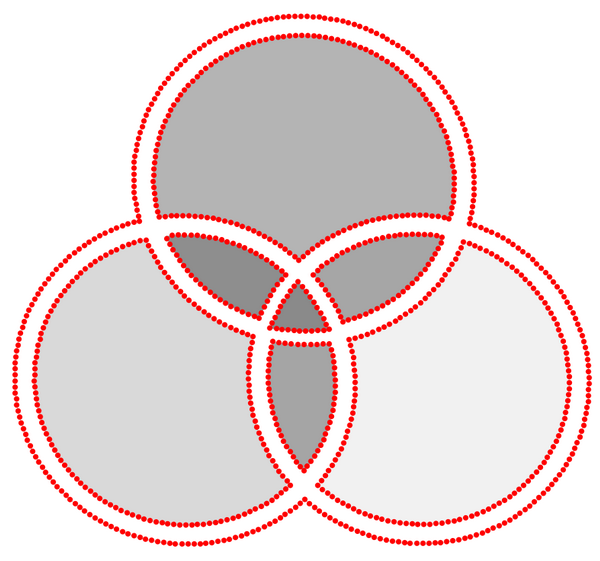
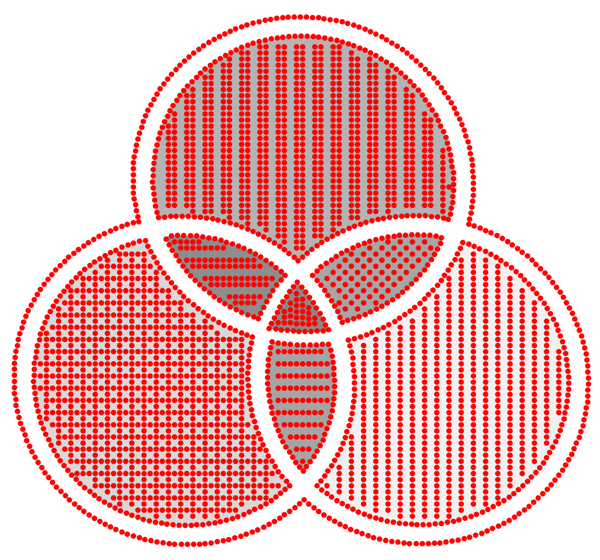
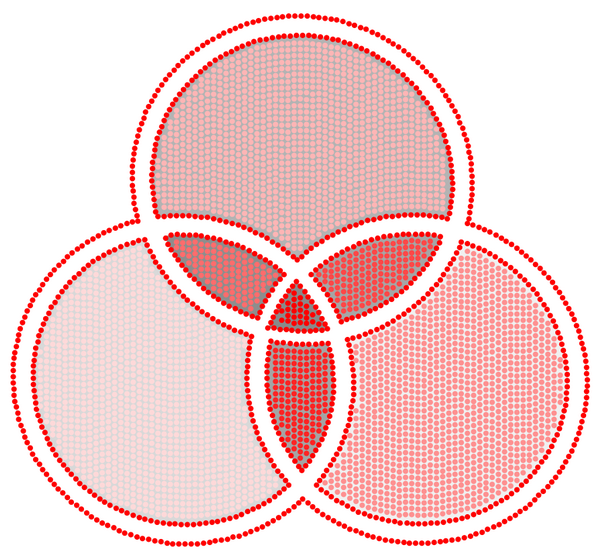
When the Embossing type is set to «ElPicsPrint Braille printing» and «Fill colored objects with dots» is not selected in Emboss mode, the fill color does not affect the embossing result. If you want to use automatic filling of colored objects, choose the color that is most convenient in terms of tactile perception, and not based on the actual color of the objects being drawn. It is quite acceptable to fill the foliage of a tree, for example, with black, if it will be optimal for tactile perception. The image below shows the result of filling the contours with dots depending on the color and the selected embosser.
Original image:

Preview of the result for Index Braille printers with the «Fill colored objects with dots» checkbox checked in emboss mode:

Preview of the result for ViewPlus printers with the «Fill with dots of colored objects» checkbox in emboss mode:

When the Embossing type is set to «Printing on microcapsule paper», the fill color matters, if you plan to print a color image and check the «Print ink graphics» checkbox in the Emboss mode. In this case, the filling of the contour will be printed without changes. Otherwise, all color filling other than black and gray will be converted to white and will not be printed.
Preview of the result with the checkbox «Print ink graphics» checked is identical to the original image:
Preview of the result with the checkbox «Print ink graphics» unchecked:

You can change the filling texture of the contour in the «Contour Settings» menu. The selected texture will be displayed in Edit mode, which allows you to evaluate the embossing result without switching to the Emboss mode. That is the difference from the automatic filling of colored objects with dots which has been described earlier. Appearance of the texture depends on the selected Embossing type and the selected embosser, and will automatically change when you change your selection.
When the Embossing type is set to «ElPicsPrint Braille printing», the contours will be filled with the selected texture, if the texture and fill color are specified for them, regardless of whether the function of automatic filling with dots of colored objects is enabled or not.
Original image set to «ElPicsPrint Braille printing» and the specified textures:

Preview of the result with the «ElPicsPrint Braille printing» and the specified textures:

Original image and preview of the result with the «Print ink graphics» checkbox checked and set to «Printing on microcapsule paper» and the specified textures:

Preview of the result with the «Print ink graphics» checkbox unchecked and set to «Printing on microcapsule paper» and the specified textures:

If the Embossing type is set to «ElPicsPrint Braille printing» and ViewPlus embosser with support of different dot height is selected, you can set the dot height of the texture for the selected contour in the «Contour Settings» menu. The range varies from 1 to 7, where 1 is the minimum dot height. You can see it in the Emboss mode. the dot height is expressed by the intensity of the color of the inner texture filled with dots - from light red to rich red:

You can combine multiple contours into one by addition, subtraction or intersection, which allows you to create contours of complex geometric shapes. To do this, select two or more contours and select the «Combine» option from the context menu and then select the combination option you wish to apply. This function is Available when selecting two or more contours. If the operation returns an empty object, the operation will be canceled. The following merge options are available:
- Addition (Alt+G,U) — Combines two or more contours by adding.
- Subtraction (Alt+G, E) — combines two or more contours by subtracting the second and subsequent contours from the first selected contour.

- Intersection (Alt+G, E) — combines two or more contours by finding the intersection area ofall selected contours.
To split the contour into separate shapes, select the Split option from the context menu (Alt + U).
You can also apply the Eraser tool to selected contours. It makes transparent the contour parts in its covering area.
You can group several contours into one single object (group). To do that, select the contours you wish to group and select Group from the context menu or press Ctrl+G. You need to ungroup anchor points of grouped contours Before editing them. To do that, select Ungroup from the context menu, press Ctrl+U or double click the selected contour, and ElPicsPrint will prompt you to ungroup it.
You can change the Z-index of the contour, that is, place it in front or back of other objects in the document. To do this, select the «Change Z-index» option from the context menu and then select the action you wish to apply. The following options are available: Raise selection to top (Ctrl+Home), Lower selection to bottom (Ctrl+End), Raise selection one step (Ctrl+PageUp), Lower selection one step (Ctrl+PageDown).
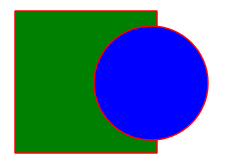
Filling with color and textures is recommended only for closed contours. When filling open contours with a color or texture, the fill boundary will follow the line connecting the first and last points of the contour. You can convert an open contour to a closed contour by merging it with another contour. To do this, select both contours and select the «Join» item from the context menu and then select the «Union» join option. The result is a closed figure, which includes the internal areas of the combined contours. The image below shows the original open and closed contours before (left) and after (right) merging:
Editing Text Fields
You can rotate and move selected text fields the same way as you do it for other objects in your document. To start editing the contents of the text field, double click on it. This mode allows you to edit text according to your liking and perform usual actions like copying and pasting. When entering or editing text ElPicsPrint automatically converts it into Braille using selected Braille table. The Braille text width can be slightly different from the source text width. As you type, you can combine print text and braille in the same text field. If you type Braille characters in 6-key entry mode those characters are not converted using the translation table. You should enable the Braille input mode For direct Braille input. It is turned on and off by the «Braille Input» checkbox on the toolbar, or by pressing F2 on the keyboard.
You can change your Braille translation table by selecting the Liblouis Braille translation Table option from the context menu of the edit text field.
If it is impossible to correctly convert text using the selected Braille table, the background of the text field will become pink. When trying to open the document for preview in this case you'll receive a warning message.

Note: ElPicsPrint searches for translation table files in its installation folder, in the subfolder. If a table you’d like to select is missing in the list, please verify that the file contains the required attribute. It must contain the name of the table as displayed in this list. ElPicsPrint supports translation tables only for literary Braille. 8-dot computer Braille tables are not supported.
Editing Bitmap Images
You can rotate and move bitmap images that are part of your document, as well as change proportions of such images. You can also apply the Eraser tool that makes transparent all image parts in its covering area.
Navigation in the Document
By default, the open document is fully positioned in the application window. If necessary, you can change zooming using the mouse wheel or Ctrl+Plus and Ctrl+Minus keyboard shortcuts. When using the mouse, the document is zoomed relative to the point over which the mouse pointer is located; and when using the keyboard - relative to the center of the visible part of the work area. When zoomed in, you can pan the document using the scroll bars or using the mouse while holding down the Space bar or middle mouse button (scroll wheel).
Object Actions and the Context Menu
You can perform the following actions with selected objects. These actions are available in the context menu or using keyboard shortcuts:
- Delete (Delete) — Removes all selected items.
- Copy (Ctrl+C) — Places selected objects into the clipboard.
- Paste (Ctrl+V) — Pastes an object from the clipboard.
- Group (Ctrl+G) / Ungroup (Ctrl+U) — Groups and ungroups contours. You can group several contours into one single object for easier processing or for protecting it from accidental changes.
- Combine - allows you to create contours of complex geometric shapes by combining multiple contours into one object. This function is available if two or more contours are selected. The following merge options are available:
- Addition (Alt+G, U) — Combines two or more contours by adding.
- Subtraction (Alt+G, E) — combines two or more contours by subtracting the second and subsequent contours from the first selected contour.
- Intersection (Alt+G, I) — combines two or more contours by finding the intersection area ofall selected contours.
- Split (Alt+U) — Divides the selected contour into shapes. The option is available if you select a single contour, which was obtained by using the Group option, and which contains several separate shapes.
- Change Z-Index — allows you to move an object to the front or back relative to other objects in the document.
- Raise selection to top (Ctrl+Home).
- Lower selection to bottom (Ctrl+End).
- Raise selection one step (Ctrl+PageUp).
- Lower selection one step (Ctrl+PageDown).
- Contour settings - allows you to customize the properties of the contours such as the presence or absence of a stroke, its thickness, color, line type (solid and dotted), fill color, texture type and texture dot height. Available settings vary depending on the selected embossing type and selected embosser. This menu item is only available when one or more contours are selected. If there are other types of objects among the selected objects, including grouped contours, this menu item will be unavailable.
- Alignment — Allows to align selected objects relative to one of the sides or the central axes of the bounding rectangle.
- Flip — Flips selected objects relative to the horizontal or vertical axis of the bounding rectangle.
- Select All (Ctrl+A) — Selects all objects in the document.
- Show All — Brings back into visible area all objects fully or partially moved outside the embossing area.
General recommendations for preparing images
A tactile image is a source of information about the depicted object for those who explore it with fingertips, just like a usual image in full color is such a source for a sighted user. It should be as clear and easily recognizable as possible.
ElPicsPrint software allows you to create tactile graphics by embossing on a Braille embosser as well as using devices with termal technology for tactile images.
Despite the fact that the app allows you to easily change the embossing type of a document, it is better to know in advance which type you will choose, since each of them has its own distinctive features.
Printing on microcapsule paper allows for more details, but requires careful handling of color filling.
Fill colors displayed on the screen and printed out may vary. Also, depending on the printer settings, a percentage of black toner may be added to the fill during printing.
This means that after the printed paper passes through the heating device, the filling will become raised. This effect may be undesirable, so you should test all fill colors on the printer and tactile graphics machine in advance.
When embossing on a Braille embosser, you need to take into account the low resolution of embossing, rather large thickness of lines, the distance between objects. You'll have to choose textures and colors for objects that are different in style and contrast.
In order to achieve the best result, we recommend to Emboss test tactile images first and evaluate color rendering, line thickness, and texture patterns on your embosser. If you plan to share created images, it is recommended to make them universal, suitable for all embossing types. To do this, you can alternately select different embossing types and embosser options and make sure that the preliminary result meets the requirements. If necessary, you can make adjustments by switching back to the Edit mode.
You need to meet some requirements while preparing a tactile graphics in the ElPicsPrint app in order to create a high-quality image:
- The choice of the paper size and orientation should correspond to the degree of complexity and details of the image, as well as the selected scale. For example, an image of a car can be placed on A4 paper - this paper size will be enough to reflect the contour and main external elements. If you need more details, a cutaway picture or an image of a car with small elements, then you should choose a larger scale and place the entire image on A3 paper. So it will be more convenient for a user to study it.
- The distance between objects must be at least 3 mm.
- Minimum details, unnecessary parts in the image and around.
- Do not use objects smaller than 5 mm.
- Do not use more than three textures on one image. It is believed that the use of a large number of textures in one image complicates the process of pattern recognition for a user. Also, do not use two textures similar in pattern in one image.
- Color combinations should not be chosen based only on the natural color of the object. It is necessary to avoid using a number of colors that are similar in tone or color saturation. Use combinations which provide more contrast.
- It is better to determine in advance where the text labels will be located, and take them into account when arranging the image on the page.
Creating a new image
The image can be created from scratch using the drawing tools, or you can use a bitmap image as the basis for your drawing. To create an imagee please do the following:
- Select the desired paper size, preferred embossing type and an embosser (installed in the system or virtual) and create a new document. By default, it opens in landscape (horizontal) orientation. If necessary, you can use Rotate page by 90° button to change the orientation to portrait.
- Use the basic tools such as «Pencil», «Shapes», «Rectangle» and «Ellipse», «Eraser», etc. to draw your picture. You can also use functions for transforming and editing already drawn elements - adjusting the thickness, color, filling and textures of contours, work with anchor points of the contour, reflection, addition, subtraction, intersection, grouping. Objects can be moved to a layer above or below the one they were created on. The grid will help you to Keep the proportions, sizes and alignment of objects relative to each other. Tools for drawing and editing objects are described in detail earlier in this manual.
- If necessary, you can add text labels with explanations and a title to your tactile graphics using the Text tool.
- Switch to the Emboss mode to preview the resulting image. If you see unwanted effects in the filling of objects with textures, objects or lines that are too close to each other, you need to return to the Edit mode and fix the problem.
To simplify the drawing process, you can use a bitmap as a background. To draw an image based on a bitmap, please do the following:
- Import bitmap to the workspace using the Image tool.
- If needed, apply options such as moving, zooming, or rotating. They are available for a bitmap in the same way as for geometric objects.
- Use standard application tools by drawing objects over a bitmap. The Magic Wand tool is well suited for this purpose. It allows you to draw a closed contour around an area of certain color.
- Delete bitmap.
- Edit and adjust contours as needed.
Preparing images with third-party applications
Working with svg Images
ElPicsPrint version 2 supports svg files, so to prepare your images you can use third-party software, such as Adobe Illustrator, CorelDraw, Inkscape etc. or use them together with ElPicsPrint. However, please take into account the following recommendations:
- ElPicsPrint does not support some svg object types. If a file being opened contains curves not supported by ElPicsPrint, they will be transformed into Bezier curves, with certain tolerance. Some types of unsupported objects will not be displayed or will be displayed incorrectly.
- The «pattern» object often used to create contour textures, is not supported. When opening an svg file containing such elements, the app will offer to delete them or automatically replace these textures with supported ones.
- Bitmap images should be embedded into the svg file.
- It is recommended to create new svg files in ElPicsPrint with required paper size, and then open it in a third-party graphics editor for further processing.
- In order to fully or partially copy the contents of an svg file into an existing ElPicsPrint document, it is recommended to open the source svg file in a new instance of ElPicsPrint, select the elements you are interested in and copy them to the target document. After or before copying, it may be necessary to transform these objects, since the resolution of documents may differ significantly, and after copying, the inserted object may not fit into the document, or be too small. If such an operation does not lead to the desired result, it is recommended to create a new document based on the original svg document.
Working with Bitmap Images
ElPicsPrint version 2 and later supports bitmap image files, the same as its earlier versions. When opening a bmp, jpg or png image, the software creates a new document with the selected margins and paper size and adds the bitmap image to the document the same way as if the Image tool was used. You can add an unlimited number of bitmaps to your document with this tool. You can change the image size and position as usual. You can also perform other actions with the image: combine several images in one document, apply the Eraser tool, add text labels, even on top of those already present on the image, etc.
These images will be converted to tactile graphics based on the selected embossing type and the Border detector setting that is available in emboss mode.
However, it is not recommended way of creating and storing tactile images when using ElPicsPrint version 2 and higher. It is highly recommended to use the vector data storage format.
If you still decide to use ready-made bitmap images or use third-party bitmap graphics editors to prepare images and then use them with ElPicsPrint, follow the recommendations below:
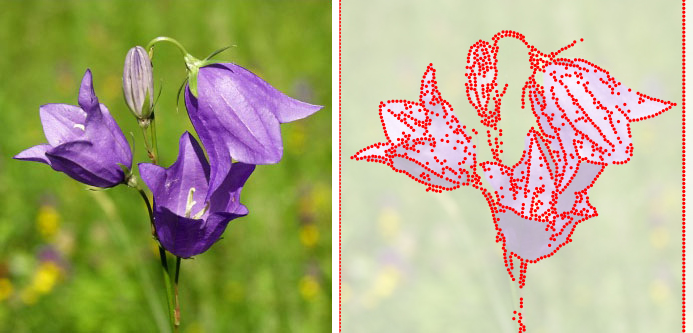
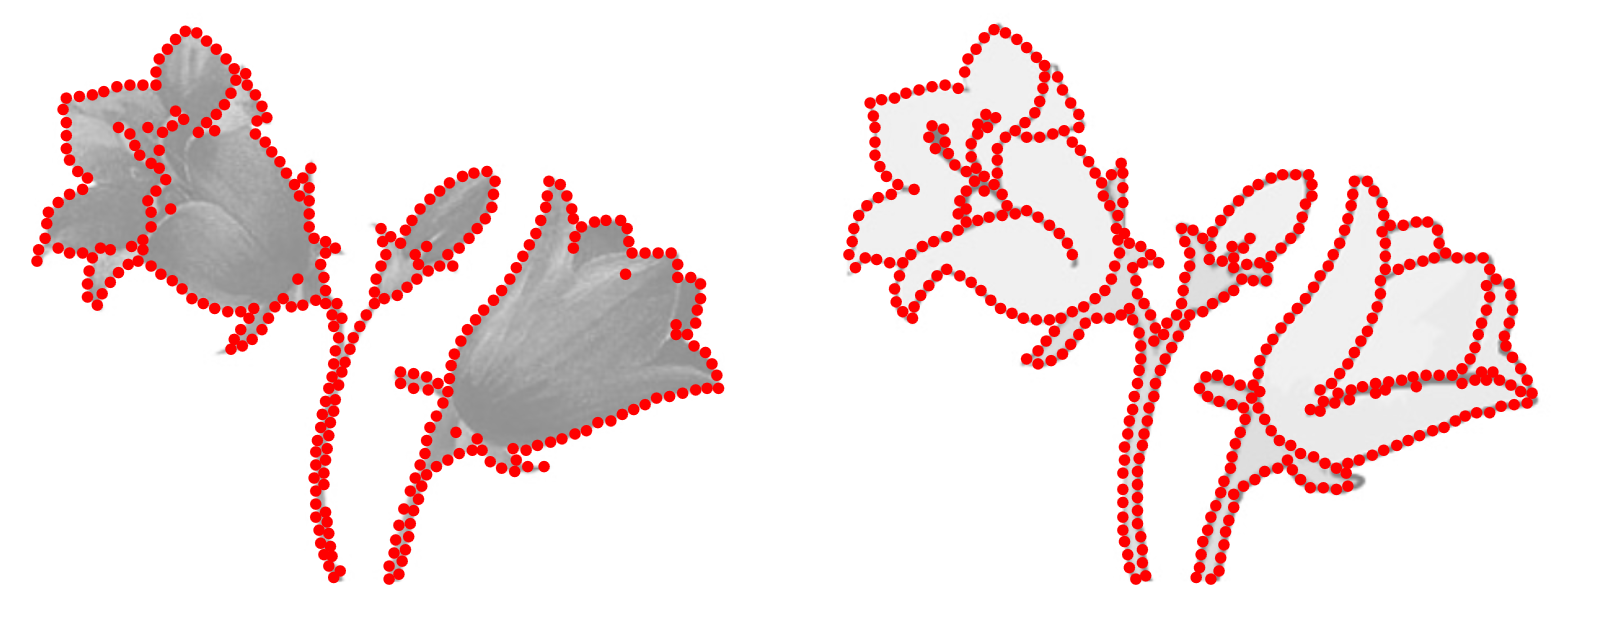
When choosing bitmap images to add into your document, select images with clear-cut contour and uniform background. Usual, even clear photo most likely won’t fit for embossing because there’s no way to recognize by touch.
As an example, let’s take an image of a bluebell. If you try to emboss such a photo, the result will be unreadable even with text labels describing the image.
A drawing like this one would fit better For our goal:

A blind user won’t be able to recognize details on a tactile image if they are too small. Separate the image into several pieces if needed, or modify the image so that only important details would be present. Clean the image of all extraneous elements by using a graphics editor. If you have parts that are not so clearly contoured, draw them by hand. For example, like this:

The image that is prepared this way can then be embossed.
If you use bitmap graphics editor to prepare your images, or save images prepared in vector graphics editor as bitmap images, we recommend to do the following to achieve the best results:
- The resolution should be at 300 DPI.
- The image dimensions for embossing on an A4 paper should be at 282 x 195 mm (3331 x 2303 px).
- The image dimensions for embossing on an A3 paper should be at 405 x 282 mm (4784 x 3330 px).
- Recommended spacing between lines and details of the image should not be less than 24 px.
- Lines should be 1 or 2 px thick. A line that is 24 px thick or more will be embossed as a double row of dots.
- The image should consist of lines and/or areas filled with color.
- In order to have the border between two neighboring colored areas recognized correctly, the colors should be different either by saturation or by contrast.
- An object filled with color should have a contour of the same color as the filling.
When creating bitmap images, you can add Braille labels to them. The app will recognize those labels and will be able to emboss them even if you change the paper size. For the labels to be well recognized the image should have the recommended dimensions (see above).
Use the «Braille» font that is provided together with ElPicsPrint and is installed to your system automatically. The standard font size is 18 points (7 mm). Text typed using another font may be recognized incorrectly or treated as an image.
To create tactile graphics with conventions or comments inside, beware of the following:
- Place your text on the image and the image itself horizontally.
- Place the text 10 px or more from the other objects.
- The text color should contrast with the background color.
Embossing the Image
In order to emboss a previously opened document, switch to the Emboss mode by clicking on the «Emboss Mode» button. To be able to emboss tactile images using ElPicsPrint, you should have a Braille embosser (or a printer for printing on microcapsule paper) connected to your PC and the corresponding drivers installed.
Make sure the Embossing type you select matches the printer or embosser you plan to sent a print job to. Select the desired printer or embosser from the list of available devices, a paper size you plan to emboss on, set the number of copies to be embossed, the desired embosser settings, and click the Emboss button.
Further, if Embossing type is set to «ElPicsPrint Braille printing», the job will be sent to the embosser. If Embossing type is set to «Printing on microcapsule paper» or «Printing controlled by embosser driver», the print dialog box for the selected printer will open. In this window, configure settings such as paper size and type, input tray, color, or other settings, and continue to follow the instructions in the print window of your device.
In order to emboss tactile images using Index Braille V4 embossers, you should have firmware version 1.5.3 or later. If the firmware version on your V4 embosser is lower, please contact «Elita Group» technical support.
When using embossers from Index Braille, select the appropriate paper size in the embosser settings as it's indicated in the app. Select the landscape orientation of the selected paper size, if specified in the software.
It is recommended to use either synthetic paper or usual 160-200 g/m² paper for embossing.
Note: If you receive an error 213 (Document Max Value - maximum document size), 214 (Document Max Char Per Line - maximum number of characters per line) or 215 (Document Max Lines Per Page - maximum number of lines per page) when using an embosser from Index Braille, please make sure that the same paper size is selected in the embosser settings as in ElPicsPrint. If the error persists, check the paper size settings on the embosser. The number of characters per line and the number of lines per page must be set to the maximum values allowed.